


 0
0
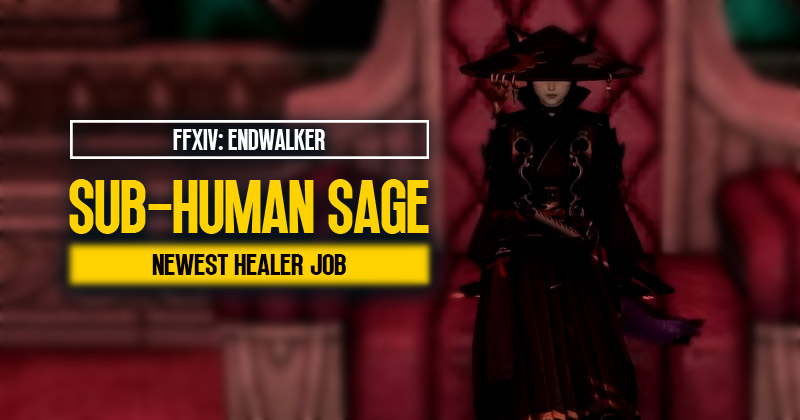
FFXIV Sub-Human Sage Guide: Mastering Endwalker's Newest Healer Job
Welcome to our comprehensive guide for the Sage class in FFXIV Endwalker. In this guide, we will delve deep into understanding the Sage class, its unique characteristics, differences from other healing classes, meta-game considerations, and gameplay mechanics. We will also explore the distinct features of the Kardia fairy and the effectiveness of the EU Regulatory Shields. Let's embark on this spiritual journey together and become masters of the Sage job!
- Sage
- Kardia is unique
- Meta
- No Way, Dude
- Eukrasia
- EU Regulatory Shields
- Twin Adders(ting)
- Coca-Cola
- Two-Minute Life Cycle
- Aetherflown't
- Making a big deal out of nothing for comedic effect
- Other Heals that allow you to continue DPSing
- Gap Closing
↖ Sage
Sage may not be our preferred Spice Girl, but it is an interesting social experiment conducted by the developers of Final Fantasy 14. They wanted to explore how similar they could make two jobs and how passionately the most dedicated fans would argue that they are unique. This is similar to what happened with the Dark Knight and Paladin reworks. Sage and Scholar have approximately an 83% skill overlap, which is documented in an official-looking piece of paper.
We are sure you're eager to argue about the technical differences that may matter for one of the Savage floors or Ultimate phases that you've farmed thousands of times. We could debate the nuances of how Panjima and Expedient are distinct cooldowns, but ultimately, it's clear that Nocturnal and Diurnal Astro felt more distinct from each other. When there were only three healers, the game felt like there were more diverse healing options available.
↖ Kardia is unique
Kardia has some unique features that players should be aware of. It's important to set your fairy-targeting system on your preferred tank at the start of combat. The sage's fairy works a bit differently than other healing abilities, as it only heals when a specific GCD procs it instead of automatically targeting the lowest percentage HP target.
Players who choose not to use this GCD will find their gameplay experience more challenging. While Kardia and fairy are functionally similar in terms of healing potency, players can manually direct their fairy, which is a unique feature compared to the scholar class. It's worth noting that some players may try to provoke negative reactions, but it's important to remember that everyone's opinion is valid.
↖ Meta
Meta aims to demonstrate that two jobs, namely healers and DPS, have many similarities. However, you may be wondering which job is better. The answer is simple: go to FF Logs and check which job has slightly higher reps and that will be the superior job. Then, feel free to complain about how unbalanced the game is and insist that the other job needs to be buffed.
To become a typical FFXIV healer, all you have to do is passively blame your co-healer for any mistakes and take all the credit when things go well. Just be sure not to accept criticism since you can always stop healing and ruin the fight if you feel like it. It's worth noting that Sage, like all healers, has a single-target DPS filler and a 30-second DoT.
↖ No Way, Dude
There's a key distinction between Sage's dot and Euthanasia's activation, as the former requires a two-button combo while the latter is more like a weave that's used just before a cooldown that takes up both weaving slots. This makes Euthanasia somewhat similar to Kite. It's worth noting that Sage is widely considered to be the most effective healer in Final Fantasy 14.

↖ Eukrasia
The walker class is widely considered to be the most expansive in terms of healer gameplay, and the European Union attempted to simplify the four standard GCD (Global Cooldown) heals and two GCD DPS (Damage Per Second) buttons into just four buttons. This provides huge savings on hot bar space, which is particularly useful for those who have a lot of FFXIV items on their hot bars, such as those who have four hot bars and an extensive collection of nekopara merchandise.
If you accidentally press a button when you didn't mean to, you can easily cleanse the buff with a right click. However, the number of times you would actually want to use a non-augmented euphonium GCD heal is equivalent to the number of videos made about near automata. Therefore, if we were to replace the euphoric GCD heal and two DPS buttons with just two GCD heals and two GCD DPS buttons, we would have the same amount of hot bar space.
The primary advantage of the walker class is that its GCD heals technically instant cast, meaning you don't have to stand still to cast them. However, it still takes a second to press the first button before you press the second, and this delay is comparable to the time it takes for Scholar's Adlo shield to come out early and to the Kaspar. Realistically, there is only a 0.66 repeating second difference between them, and if this small amount of time is critical to your healing strategy, then you may need to re-evaluate your planning.
↖ EU Regulatory Shields
The EU Regulatory Shields are an effective way to protect your party members in combat. Your single-target shield has the potential to crit heal and provide a significant amount of shielding, but it cannot be spread around like other shields. The newest covet variant, exclusive to scholars, is well-known for not stacking with other shield healers due to its ability to be cast while moving. You can use this shield to protect your tank while they're pulling the entire dungeon or to enhance your mobility while healing.
However, it's important to note that all erudite skills are not affected by spell speed, which means that your global cooldown (gcd) can drift slightly every time you use one. This issue could be easily resolved with a simple line of code. Unfortunately, the creators may not appreciate suggestions from the English-speaking American community—nonetheless, the efficacy of the shield more than compensates for any potential drawbacks.
↖ Twin Adders(ting)
When breaking a sage's trademark GCD shield, whether on yourself or a single target, if you shield everyone, you'll receive a stack of Adderall. However, We misread the ability- it's actually Dark Arts that can be spent on Toxicon, an instant cast GCD that does the same damage as your normal fillers, but only on a single target after level 82. Before level 90, the numbers don't really matter except for about 60% of the currently available ultimate fights.
This isn't DPS neutral because you have to use a GCD heal before using Toxicon, which means its potency would need to be doubled to make it true. We don't have a strong opinion on DPS neutrality, but it's interesting to see the inconsistency of opinions from White Mage players who complained about a Flatus for three years straight. This movement tech is a consequence of GCD healing when it's necessary, not something to actively fish for, like hardcore stimulants. People think they're being productive when using it, but in reality, they spend more time trying to get more hits of the good stuff than actually doing anything useful, except for those with ADHD and associated conditions.
If you want to make a potency change and get me on board with your movement, you already know what button we want back: Mana Shift. Who cares about a single target when it becomes a gain on two targets? Although it's a loss of 34 over your normal AoE filler, it's a travesty because of how frequently that scenario occurs. When does that happen? It happens in various situations.

↖ Coca-Cola
If you find yourself in a tough spot, you can use Pepsi to convert your existing shields into a heal. This will result in an area-of-effect heal, regardless of whether you had a single target or an area-of-effect shield. While this technique is similar to emergency tactics, it has its own unique advantages as it heals for a fixed amount.
If you use this technique during a raid-wide attack and the shield doesn't break completely, you can still benefit from additional healing. However, keep in mind that the healing amount does not scale with the size of the shield, which means that it will heal for the same amount whether you crit, heal, or buff your next GCD with something like Zoe and then use Pepsi.
Therefore, in certain situations, this technique can be more effective than using Scholar, but in other scenarios, Scholar may still be the better option.
↖ Two-Minute Life Cycle
The Two Minute Life Cycle is an interesting concept for making the Sage class unique in terms of its DPS rotation. This involves a melee range nuke that can hold two charges with a recharge time of 40 seconds. While it may sound difficult, players enjoy the two-minute metagame, which requires using two charges after three GCDs in combat, followed by a random charge at some point before using two charges again during the two-minute raid buff window. This cycle repeats every even minute.
There could be an added challenge to this by not allowing players to stand in range during the raid buff window, forcing them to think about their rotation. However, it is unlikely that the encounter designers would implement such a challenge as the raiding community is not known for being very tolerant of difficult mechanics.
Both parties - the encounter designers and the raiding community - are responsible for the current raid design. Nobody is innocent, except perhaps for the writer who believes themselves to be above criticism. With this explanation, you should now have a better understanding of how DPS and healing work in Final Fantasy 14.
↖ Aetherflown't
Sage, unlike Scholar, has several healing cooldowns that can be cast without interrupting the flow of Cardia procs. One such cooldown is Not a Third Flow, which generates a stack every 20 seconds that can be spent on various abilities. Each ability returns seven per cent of your MP, making it different from Aetherflow, which returns 20 per cent MP every minute. However, Sage gains one per cent more MP per minute than Scholar, which compensates for this difference.
Notably, Sage doesn't have a way to dispose of extra stacks, so you must use an oGCD heal randomly to keep the MP flowing, even when there's no healing required. This can be a tedious task, but it's necessary for your MP economy. If Sage had Energy Drain, it would be too similar to Scholar.
When it comes to spending Not Third Flow stacks, you have several options, including a weak single-target heal, a weak AoE heal, and a Tarot Card, which is a significant single-target heal that mitigates 10 per cent of the damage.
Although Sacred Soil is technically better in some situations, as it can be placed remotely, it's not one of the abilities you can spend Not a Third Flow stacks on. Nonetheless, at 10 realms with Regen attached to it, Sacred Soil is still a potent ability that provides a lasting buff to nearby allies.
↖ Making a big deal out of nothing for comedic effect
Using exaggeration for comedic effects is a popular tactic, but let's focus on a more practical topic. When it comes to healing, you'll want to use your big heals after taking a lot of damage, while mitigation should be applied right before a powerful attack. This strategy works well for dungeon trash pulls but can be more cumbersome in raid settings.
To optimize mitigation, you'll need to sacrifice some of your healing power and vice versa. There are situations where both can be used effectively, but it's important to note that mitigation doesn't stack with Sacred Soil.
For optimal results, stagger these cooldowns throughout a trash pull to maintain 10 mitigation for 45 seconds. Another option is to use a single stack of Aetherflow on a 90-second cooldown, though it's up to you whether you prefer Recitation or Dissipation. We've covered some exciting ground here, but there's still more to explore with other OGCD abilities.

↖ Other Heals that allow you to continue DPSing
There are several other healing abilities in addition to those that let you continue dealing with damage. Kratos has a cooldown that applies a buff to one party member, increasing all healing by 20. This can stack with Zoe and Feel, and while it may not always be practical, it's free and has a short cooldown. Hollow X heals and shields, making it a great raid-wide mitigation cooldown. It provides 10-party mitigation, which can be used in trash pulls as it stacks with other mitigation abilities. The physicist is a free AoE regen that also boosts healing potency by 10%, similar to Whispering Dawn and Fey Illumination, but without the magic mitigation.
Hi, Mom is a shield that applies a weaker shield up to five times when it's broken, making it useful for tanking bosses and raid encounters. Panhai Mom is an AoE version of Hi Mom that's also free and great for repeat raid wipes. Finally, Pneumonia is a level 90 healing ability that's powerful but can only be used when an enemy is targetable. It's a GCD ability that doesn't interrupt DPS or card procs.
↖ Gap Closing
Sage possesses a unique ability among healers in the form of a gap closer called Thunderclap. However, using it effectively requires some finesse. If you're not a fan of buffering abilities and prefer mashing buttons, you can create a mouse-over macro to activate it.
But if you want to impress your teammates truly, you can use Thunderclap to counter knockback effects. To do so, time your jump just as the knockback animation begins rather than waiting for the cast time. If you execute this strategy correctly, you will overwrite the knockback effect, leaving your teammates amazed at your skill.
Of course, if you fail to time your jump correctly, there's always Sure Cast to fall back on, as with other shared healing cooldowns. Nevertheless, mastering the art of negating knockback effects with Thunderclap is a swag strat that is sure to make you stand out in the field of battle.
Conclusion:
Both Sage and Scholar have their advantages in different situations, making them viable and enjoyable options. While the job design is well-executed, it plays it safe, resulting in a lack of uniqueness and potential staleness. To create truly exciting and interesting jobs, creative risks must be taken, something Sage might lack. Unique elements set jobs apart and make them stand out. Nevertheless, we must acknowledge the developers' efforts in ensuring both jobs remain viable options in the world of Eorzea.
Most Popular Posts
- FFXIV Patch 6.5 Power and Meta Ranking: Tier List
- FFXIV A Nocturne For Heroes 2024: 4 Regalia Mount Not To Be Missed
- FFXIV Beginner Guide For 2024: From Zero to Eorzean Hero
- FFXIV Gathering Patch 6.4 Latest Changes: How to boost your gil with proven strategies?
- FFXIV Fall Guys Collaboration Event Guide: Details & Rewards
- FFXIV Heart of Sabik: Uncover the secrets of this Enigmatic Artifact
Popular Category Lists
- Madden NFL 24 / (92)
- FC 24 / (73)
- New World / (72)
- Elder Scrolls Online / (55)
- Guild Wars 2 / (55)
- NBA 2K24 / (55)
- FFXIV / (50)
- NHL 24 / (35)
- Path of Exile / (18)
- SWTOR / (13)
- Diablo IV / (4)
- WoW Classic SoD / (4)
- Runescape / (2)
- Albion / (1)
- Throne and Liberty / (1)


